

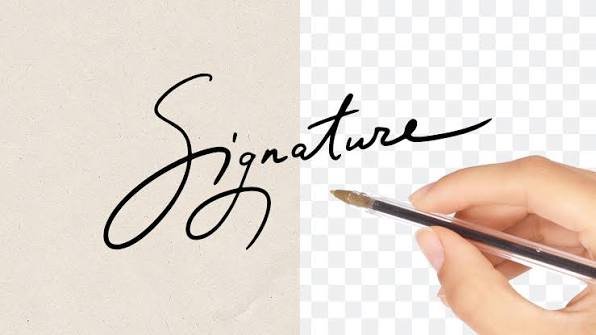
A signature is a small thing, but it carries a lot of weight. It closes a contract, approves an invoice, confirms an application, and tells the reader that a real person stands behind the document. These days that signature rarely travels on paper. It gets scanned, photographed, and pasted into PDFs, Word documents, online forms, and contracts that may never be printed at all.
That is where a familiar problem appears. You sign neatly on a sheet of paper, take a photo or scan it, and the result is a greyish rectangle with shadows in the corners and a faint line from the notebook underneath. Pasted onto a clean white document, it looks like exactly what it is: a photo of a signature, not a signature. Removing the background fixes that. What you are left with is just the ink, on transparency, ready to sit naturally on any document.
What Removing the Background Actually Means
When you remove the background from a signature image, software separates the dark strokes of your pen from everything else in the picture: the paper, the shadows, the desk underneath, and any lines or marks that are not part of the signature itself. The background is then replaced with transparency, which simply means those pixels become see-through.
Saved in the right format, usually PNG, the signature can be placed over a white page, a coloured form, a letterhead, or a photograph, and only the ink shows. There is no box around it, no mismatched shade of white, and no shadow giving away that it was photographed on a kitchen table.
Why Bother? The Practical Reasons
The first reason is appearance, and it matters more than people admit. A contract, proposal, or formal letter with a clean signature looks finished. The same document with a grey box around the signature looks assembled in a hurry. Clients, employers, and officials may never comment on it, but they notice, and it quietly shapes how professional the document feels.
The second reason is flexibility. A signature with a transparent background works anywhere. The same file can go on a white contract today, a company form with a light blue header tomorrow, and a certificate next month. A signature saved as a plain photo only looks right on backgrounds that happen to match the paper it was photographed on.
The third reason is consistency. Businesses that send a lot of documents, quotes, invoices, approvals, and agreements, often need the same signature in the same place, at the same size, again and again. One clean signature file, kept ready, saves the repeated cycle of signing, scanning, and cropping every single time.
How the Technology Works
Older methods worked by a simple rule: make everything light into transparency and keep everything dark. That works on a perfect scan, but real photos are rarely perfect. Paper is not pure white, phone cameras add shadows, and ink is not always fully black, especially where the pen moved fast and the stroke is thin.
Newer tools use image recognition instead. The software studies the picture and decides, pixel by pixel, what belongs to the signature and what belongs to the background. It follows the edges of each stroke, handles grey shadows and faint paper texture, and can usually keep thin, light strokes that a simple brightness rule would erase. This is why a modern remover can work from an ordinary phone photo taken in normal room light, not just from a flatbed scan made in ideal conditions.
The difference shows most at the edges. A good result has smooth, natural stroke edges that look like ink. A poor result has jagged edges, a thin white halo around each stroke, or missing pieces where the pen stroke was lightest.
How to Do It, Step by Step
Start with the signature itself. Sign your name a few times on a clean, plain white sheet of paper, using a dark pen with a steady flow, a black or dark blue gel pen or fine marker usually works best. Pick the version that looks most like your normal signature on a good day. Plain paper matters: lines, grids, and patterns from a notebook page all become extra work for the software later.
Next, photograph or scan it straight. Lay the paper flat, hold the phone directly above it so the signature is not stretched at an angle, and use even light without a strong shadow falling across the page. Crop the image so the signature fills most of the frame, but leave a small margin around it.
Then process the image. Online tools that let you remove background from signature images will take the photo, detect the strokes, and strip away the paper and shadows in a few seconds. Check the preview carefully before you download. Zoom in and look at the thin parts of the signature, the crossing strokes and the tail at the end, because those are the places where detail is most often lost.
Download the result as a PNG file, since PNG keeps the transparent background. A JPG cannot store transparency, so saving as JPG simply puts the signature back onto a white box. Finally, place the PNG into your document, resize it in proportion so it is not stretched, and position it on the signature line just as you would sign by hand.
Tips for a Cleaner Result
A few small habits make a noticeable difference. Sign slightly larger than you normally would, because a bigger original holds more detail when it is reduced to document size. Avoid ballpoint pens that skip, since broken strokes confuse the software and look worse on screen. If your photo has a shadow on one side, retake it rather than trying to rescue it, as even light is the single biggest factor in a clean result. And keep the untouched original photo somewhere safe, so you can process it again later if you ever need a different size or a second attempt.
Common Problems and What Causes Them
If parts of your signature disappear, the strokes were probably too light or too thin for the image quality. Sign again with a darker pen and a slower hand. If a grey shadow remains around the signature, the photo lighting was uneven, and a retake in brighter, flatter light usually fixes it. If the edges look rough or spiky, the original image was likely small or blurry, so a closer, sharper photo helps. Ruled lines showing through are the hardest problem, which is why plain paper at the start saves so much trouble.
A Word About Safety and Honest Use
A transparent signature file is convenient, and for the same reason it deserves some care. It is, in effect, a reusable copy of your signature, so treat it like a document, not like a random image. Keep it in a private folder, do not post it publicly or send it around casually, and only place it on documents you have actually read and approved. Businesses should agree internally on who is allowed to use a director’s or manager’s signature file, and on what, because a pasted signature carries the same trust as a handwritten one.
It is also worth knowing the difference between a signature image and a digital signature. A pasted image is a picture of your handwritten signature. A digital or electronic signature, the kind made through signing platforms, adds identity checks and a record of when and how the document was signed. Some organisations and legal processes accept a signature image, others require a proper electronic signing process. When a document really matters, check which one is expected before you send it.
Frequently Asked Questions
Can I do this with a phone photo, or do I need a scanner? A phone photo is enough in most cases. Modern background removal handles ordinary photos well, as long as the paper is flat, the light is even, and the signature is in focus. A scanner gives a slightly cleaner starting point, but it is not required.
Which file format should I save the signature in? PNG. It is the common format that preserves the transparent background. If your signature has a white or grey box around it after saving, it was almost certainly saved as JPG or another format without transparency.
Will the signature look real on a document? Yes, if the original was signed at a reasonable size with a dark pen and processed cleanly. The result is your actual handwriting, just without the paper around it, so it looks like ink placed on the page rather than a photo pasted onto it.
Can I use the same signature file for everything? You can reuse it across your own documents, and many people do. Just keep the file secure, and remember that some formal processes ask for a fresh signature or a verified electronic signature instead of an image.
Final Thoughts
Removing the background from a signature is a small job, but it is one of those small jobs that changes how every document you send looks and feels. A few minutes spent signing on plain paper, taking a clean photo, and saving a proper transparent PNG gives you a signature that drops neatly into contracts, forms, letters, and certificates, with no grey boxes and no shadows. Do it once, store the file safely, and every document after that gets a little easier and a little more professional.